Signal types
The Signal Types are pretty similar to the What you would find in ATraq Desktop. The colors are the same.
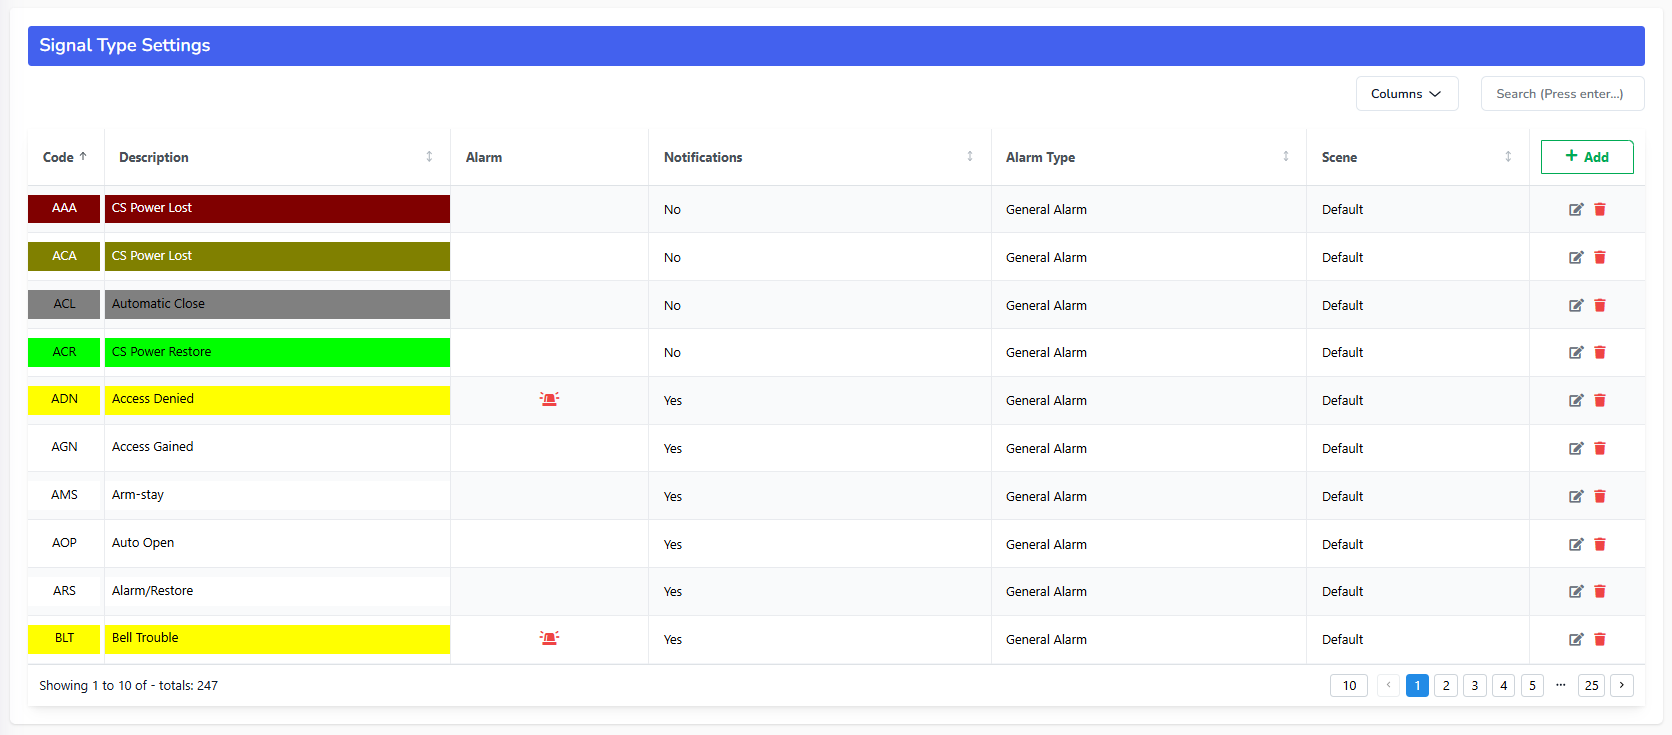
The search box is in the top right corner. You can now search a wider range of fields. You can also see the scenes, alarm types and the notifications of each of the signal type.
When you click on the either the add button or the edit button next to the signal type you wish to edit, the you will see the following window.

The Code must be a unique 3 character code. They can only be: A->Z and 0 -> 9
The description is what that signal is.
If this signal type is an alarm then you must turn the alarm switch on.
Set the priority of the alarm between 0 to 99. The lower the number, the higher the priority.
Choose the alarm type for that signal type. The alarm type enables the alarm windows to bring the associated call list with that alarm.
You can set the colors of the signal from by choosing the background and font colors.
The next step is to choose the scene associated with that alarm. This is new to ATraqII and you have full control of what the operator sees in which order the details of that alarm. If you want to create a special scene for this alarm type click on Add.
If the alarm type is medicale in nature, then the isMedical should be checked. The reason for this is that It's going to provide the medical details with the alarm evaluation screen for operators that have the authority. So we want to make sure we are abiding privacy regulations.
If you choose the Wait for Restore, you must enter a restore signal for that alarm to be put on hold for a few minutes set in the Wait field. In the background it will actually be pended and once it is released, it will check if the restore signal is received. If it is received, then it will not be seen on the screen as an alarm during that operation period.
If you choose to pend the alarm, then I will postpone the alarm for period stated in Pend time. It will not look for a restore for that alarm.
If you choose to allow the operator to only save the alarm without postponing it, the you may turn on the Only Save switch
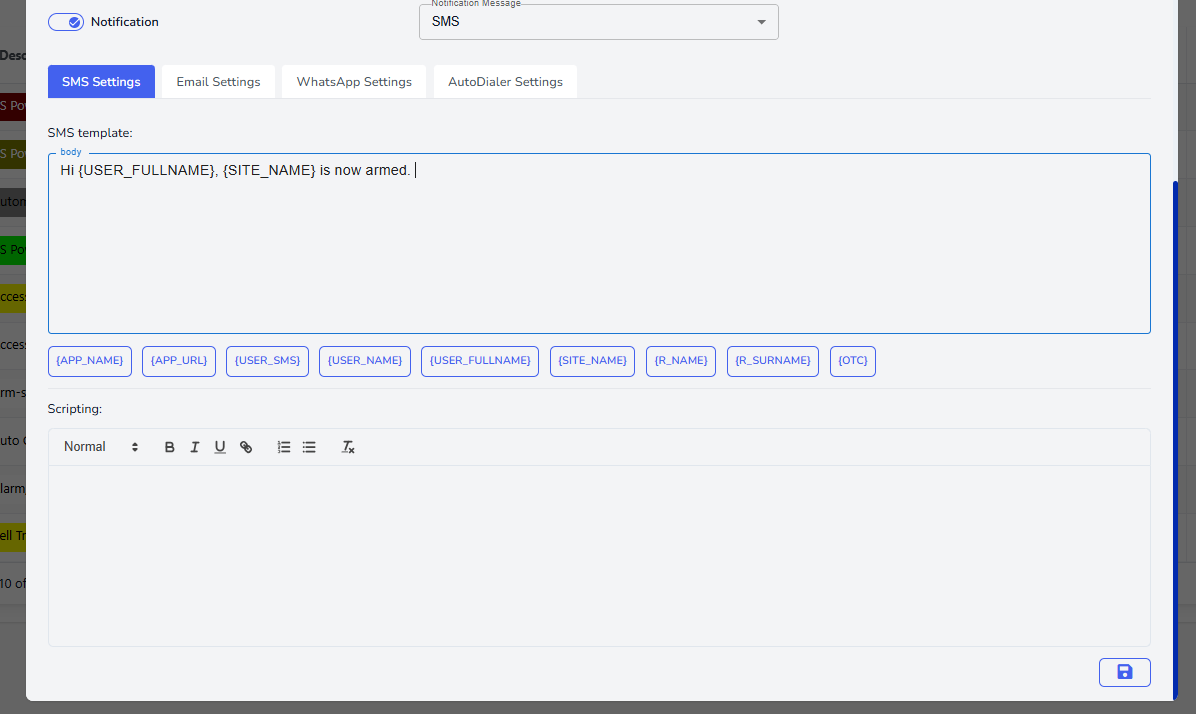
Now for the fun part: You can create a different text message template for SMS, for email and the other services. When you turn on the notification for that signal type, you are given a list of notification types you can use. Choose the templates that you wish to prepare for that signal Type. Next click on the service you wish to prepare a template for. Create the message template using the variables that are located under the text area. After you click on a template, it's copied and you paste the variable where every you want in the message. For the Email templates you need to know a little bit of HTML to create impressive emails.
Last bu not least is the scripting area. This is a rich text area where you can create the prompts used for the operators to read as they make calls with customers. We have prepared a few ready prompts to use. So you need a little bit of customisation. But you can always create the whole texts from scratch. Try to make it easy to read and not big bulky paragraphs.